High Heels Anonymous

March 29, 2013
Hi everyone. My name is Sue and I am a heel virgin. Surprised? Well, it's true. The highest pair of heels I own are two inches and I never wear them. It's not that I have anything against the heels, exactly, it's just that I've never seen them as practical. They're difficult to walk in, they're uncomfortable, and heels are a male invention designed to make women's butts look smaller . . . and to make it harder for them to run away. Ha ha... Love that movie...
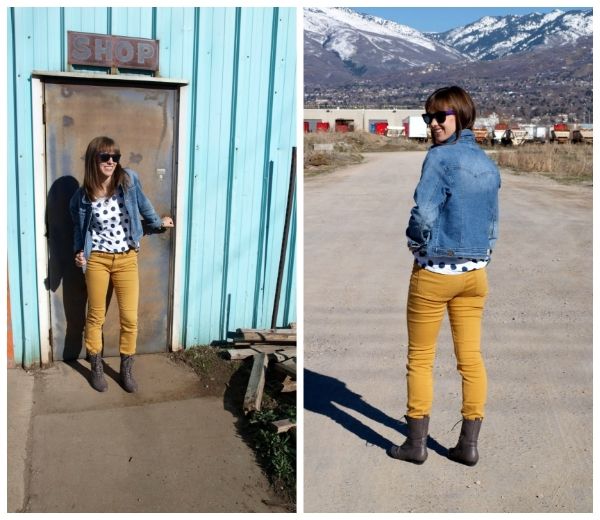
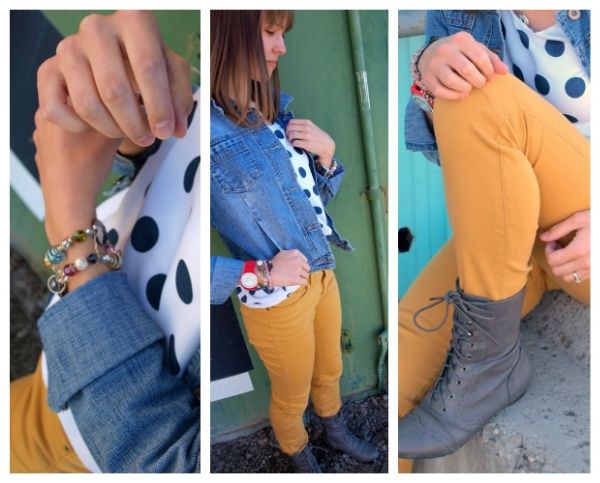
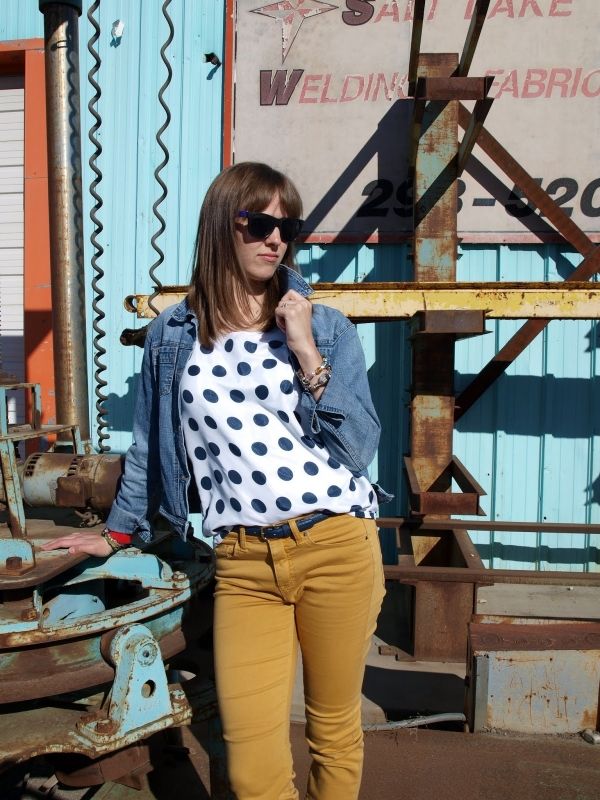
Well, anyway, the point is, I'm a heel virgin... That is, I was until I moved into the basement of the house where Mariasha was living. Mariasha exited the High Heel Virgin's Club in fifth grade and owns a LOT of them and she decided to take it upon herself to introduce and initiate me into the adult women's world of high-heeled luster where I learned that not all heels are difficult to walk in and uncomfortable. The following photos signify the end of a very long era.


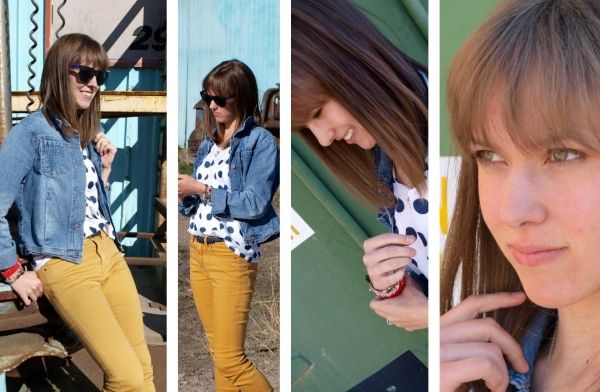
Mariasha and I have been enjoying the new competition show, The Face, and so I've been working on changing up the emotions I show in my photos. I'm pretty sure the only ones I managed were smiling, pensive, fierce, superhero, and then an expression that lies somewhere between a scowl and a smirk. I'll spare you those ones and in the process, spare myself some embarrassment. It's a win-win scenario.


Now I just need to find a good Easter outfit to go with it this Sunday! Do you have your outfit all planned out already?
Happy Easter!

-Sue
4

Easter Cupcakes for my Peeps!

March 27, 2013
I think Easter is one of my favorite holidays. In a lot of ways, I like it even better than Halloween and almost better than Christmas. I think the reason I like it so much has to do with the idea of the world kind of being reborn. I love springtime and it just seems like you've been in a pit for a long time and finally things are starting to look up, like the Savior being resurrected. I don't think that the time of year that we celebrate this is coincidence. It's a beautiful time of year.
Plus, decorations for this time of year are so cute! And the crafting opportunities are endless! At this point in my life, I don't go too crazy with the home decor (As soon as we have our own home that will change), but I do love me some good baking! So without further ado, here's my latest and favorite baking creation!


I honestly don't know how people don't like peeps (Drew being one of them), but these are a pretty dang good alternative and they were really easy to make. You might have seen this on Pinterest, because I'll admit that's where I got my idea.


Ingredients:
One box of cake mix (let's keep it simple)
Cupcake liners
Food coloring
Sugar (about 1/4 c.)
Mini chocolate chips
Piping bag and tip (the smallest circular tip)
1/2 c. oil
1 c. water
3 eggs
1/2 c. blue bonnet vegetable spread (or butter) at room temperature
1 Tbs. milk
1 tsp. vanilla extract
4 c. powdered sugar

Step 1 (cupcakes): Turn the oven to 350 degrees fahrenheit. Follow the directions on the cake mix box to make the cupcake batter, line your muffin tin with the liners, and fill each about 2/3 full. Bake in the oven for 15-20 minutes.

Step 2 (frosting): While the cupcakes are baking, begin making the frosting. Use a stand alone mixed or hand mixer to mix the butter until smooth. Mix in 1 Tbs. of milk, and add in a cup of powdered sugar. Next, mix in a teaspoon of vanilla, then add in the rest of the powdered sugar a cup at a time until you reach the desired consistency. Add in 4-8 drops of yellow food coloring until it turns the color you want for your peeps.

Step 3 (colored sugar): Pour 1/4 c. sugar into a shallow bowl and, one drop at a time, add in yellow food coloring, stirring the sugar and squishing any clumps to turn it yellow. I think I used maybe four drops. The sugar doesn't have to be completely yellow. Just enough so it doesn't show white on your yellow frosting.

Step 4 (decorate): Once you've allowed the cupcakes to cool completely, frost the top like you would butter bread. Just a layer of frosting across the top. Next, dip the top in the yellow sugar, being sure to coat the entire frosted surface. Place the mini chocolate chips upside down in the frosting for the eyes, scoop half the frosting into your piping bag with the small circular tip, and "draw" the wings. There might be a pre-made piping tip in the shape you want, but I didn't have it. Color the rest of the frosting orange and use that to make the feet and beak.

And there you have it! A deliciously cute, tasty treat to enjoy this Easter!

See you Friday!

-Sue

1

Salted Caramel Sauce

March 22, 2013
I've never made caramel before and let me tell you, this was a good one to start out on! It seriously tastes amazing! I didn't get any pictures of the process because you kind of have to keep your eye on it the entire time so it doesn't burn, but I'll torture pleasure you with photos of the end product thought the directions. Sound good? K. Here we go.


Ingredients:
2 c. Sugar
12 Tbs. butter cut into pieces (like half tablespoon pieces), at room temperature
1 c. Heavy cream at room temperature
1 Tbs. fleur de sel or Maldon sea salt flakes. I just used regular 'ol salt and it worked for me.

I only made a quarter of the recipe since it's just me and my husband and it made a small jar full so I'll leave that choice up to you.

Step 1. Get everything set up beforehand so that you can move quickly and avoid burning your caramel. Heat your sugar in the bottom of a 2-3 quart saucepan. When the sugar starts melting, whisk continuously. The sugar will clump at first, just keep whisking. When it's all melted, put the whisk away. You can swirl the pan to keep it from burning. Do this until it turns a dark amber color. If you have a thermometer, use it. You don't want it to get hotter than 350 degrees (Fahrenheit) or it will burn.


Step 2. Carefully add the pieces of butter stirring until it all melts. Remove the pot from the burner and slowly stir in the heavy cream until it's all mixed in and the caramel is smooth.

Step 3. Finally, stir in the salt and leave in the pot to cool for 10 minutes. Pour carefully into a jar and allow it to cool further before enjoying.

Enjoy with some apple slices, cinnamon pretzels bites, or whatever else you enjoy with caramel. I'm pretty sure I could eat it plain. Store in the refrigerator. It should keep for at least a month, but In my house, I don't think it will make it past a couple of days. Give it a try and let me know what you think! What do you like to eat with caramel?

2

Nostalgia

March 20, 2013
Remember on Friday how I posted about some finds on Pinterest? Do you remember the one of the outfit I said I would re-create if I had the funds? Well, turns out I already had most of the outfit and I had a few bucks to spare... At the local thrift store! Love my thrift finds! The funniest thing happened, though... The moment I put on that jean jacket, I started feeling this nostalgia... For the 90s! I was born in 1990 so I felt right at home in my jean jacket. This is my new favorite outfit. Fo sho. So here's my re-creation.

 photo 448e8b75-e562-435b-ab63-f63dae77171e_zpsbae11eaa.jpg

 photo c71ad925-15e1-4713-9bb8-78ca4893465d_zps05b9fe2e.jpg

 photo 5f9300cb-e0bb-430b-bbc3-037a256695f1_zps2bf6c08f.jpg

 photo 18425eb2-530b-4e22-a608-62b1e0f95eec_zps8d97a9dd.jpg

 photo af1d9970-2bde-4e1c-9eaa-25a59d35d2f0_zps80bcb448.jpg

 photo c3ac5986-cf62-4f25-9050-b9629a489cf2_zps1a2b15ac.jpg

 photo ea4904cc-3e99-4df2-85f7-b89f55292ade_zps9311baf3.jpg

Jean Jacket - thrift store
Eggs in nest necklace - homemade
Shirt - homemade
Belt - thrift store
Pants - Urban Outfitters
Boots - amazon find

I am SO excited about the spring coming. It's kinda like fall, but better. Looking forward to the light, airy fabrics and COLOR! What are you looking forward to this spring?

*Photography talent courtesy of Mariasha Rowland.
4

High chair cover

March 18, 2013
For a while now I've been wanting to do something like this, but wasn't exactly sure how to do it so I put it on the backburner. Then, when I made the car seat protector, I knew how to do it! Well... Sorta. I wanted to do it in a harder way than it was actually done and paid the price for my ambition later. Anyway, here's what my end product looked like. Sorry for the quality of the photos. Maybe I'll get some better ones eventually...


So it actually was really easy! I knew I didn't have to cover the entire seat because the main part that got messy was the top because Chelsea likes to suck on it... With her mouth... Full of food. I don't know why. Anyway, so here's how I made it.

You will need:
Fabric that's cut to about 9x28 inches (depending on your high chair (note: this probably won't work on all high chairs)
Iron-on vinyl, enough to cover the 9x28 inches of fabric
Quilter's binding
Velcro
1/4" elastic

If you made the car seat protector from last week, you might have al of these items already (except the elastic). Ready for step 1?

Step 1: If you haven't already, cut your fabric to be 9x28" or whatever the dimensions of your high chair are. Follow the directions and laminate your fabric. Then hem the shorter ends of the fabric.

Step 2: Sew the quilters binding along both long edges of the laminated fabric, leaving 5 inches hanging off the edges for the Velcro (I didn't have enough binding so I just sewed the Velcro on the big piece and I don't think it looks as good, but it works).

Step 3: Cut two pieces of elastic, each 17" long. Using a safety pin fastened securely to one end of the elastic, slide it through the binding, sewing the safety pin-less end to the edge once it gets there. Slide the elastic the rest of the way through and sew the other end in place. Repeat on both sides.

When you're done sewing the elastic through, it should look something like this.

Like a dying centipede or something...

Step 4: Cut four pieces of Velcro 4 inches each (2 rough sides and 2 soft sides) and sew them so that they'll work to fasten the cover to the high chair (I know you can figure it out!). I just sewed around the entire piece of Velcro.
And that's it! Now it will be MUCH easier for me to clean that high chair! Have fun with yours!

-Sue 


0

Car Seat Protector

March 13, 2013
When you're just a year out of college and barely getting your feet under you, not a lot of exciting stuff happens in the "new big items" department. Oh, I'm not complaining, though! Being the youngest (and only slightly spoiled... slightly...) and having wise, vigilant parents, I was well-aware that there is a tendency for girls in my position to want to have everything they had while growing up when their parents already had their finances and everything figured out, and they want it all right away. Not necessarily because their spoiled, but because they've got this expectation and view of how married life should be. I assume that's how other girls in my position think sometimes.
In any case, I was aware of that danger and so I've tried really hard to fight it. Sometimes I fail and go into this miserable state where I just want to cry because of what I don't have. Then I just remember something I read on Pinterest. "Sometimes I get sad, but then I remember how awesome I am and get over it." So that's basically what I do.
Anyway, so  back to what I was trying to say. Not a lot of exciting stuff happens in the "new big items" department. Well, ever since Andrew got his job, we've been setting a little aside for a car and finally, we got one!


I absolutely love it! Our old car was a two door and not exactly ideal for getting Chelsea in and out (when I say "not ideal," I mean it sucked). It's not a new car, but it's a new-to-us car and it's almost exactly like my mom's car she got a few years back so I either feel really mature driving it, or like a teenager just borrowing it for the day.
Now I'm not clean freak, but I do like to keep my things neat and tidy, plus I know leather seats can get pretty beat up by baby car seats. I came up with this for a solution... Alright, alright, I got the idea off of Pinterest, but I altered it to fit my own specifications.

The Car Seat Protector!

I love it! Every time I look in the back of the car and see it, it makes me happy! It looks professional and, most importantly, it protects the seat! I had to cut a chunk out of the side for the car seat anchor to be able to go through, but that doesn't interfere with the protection of the seats at all. It wasn't too difficult, but it was a little time consuming. Lucky for you, it's in my Etsy shop for a great price, but for you DIYers, I'll give you a quick run down of how I did it.

Materials needed:
Laminated fabric (you can buy laminated fabric from etsy or make it yourself)
Quilter's Binding
Double Fold Bias tape (mine was extra wide)
Velcro

Figure out how wide and how long you want your seat protector to be (mine is 18x47") and cut your fabric to those measurements, using a plate to give you nice curves around the corners. The print on my fabric was sideways so I had to cut two pieces to fit. Hold the piece(s) up to the car seat (on the same side you want it to be when you're done) to decide how far in to cut the chunk out for the car seat anchor. Sew the two pieces together (if you have two pieces) then pin your bias tape all the way around. Add the quilter's binding to the top by sewing it to the bias and letting it extend from the point where the top corner of your seat protector stops curving. Do this on both sides of the top. Sew your Velcro to that. Voila! C'est fini!

Disclaimer: Most manufacturers and safety specialists say that placing something thin (like a thin towel) under a seat is okay, but check with your car seat manufacturere and up to date car seat safety info to make sure. Also most fires stations will check your car seat for you to make sure it is installed correctly. See more at: http://www.car-safety.org/faq.html#Q36

Please stop by my Etsy shop and check it out! I've got a few other items there that you'll want to check on as well! Maybe you can leave a comment and tell me which one you like best? Hope to see you there!

-Sue


This product is Chelsea approved!

Here are some of my other items in my Etsy shop! Hope you like them!
Changing Mat

Sunglasses Cozy

Laptop Sleeve
4

In a Letter to my Daughter

March 11, 2013
It's been a while since I wrote a poem so here is one for you, and this one is special. Remember the Mom Box I told you about a few posts ago? I wrote a letter for my first little note for Chelsea and had a sweet little experience doing it. The poem explains what happened.

In a Letter to my Daughter

I wrote a letter to my daughter today
And ended it with “Love,”
When all at once, a revelation.
I’ll explain what I’m speaking of.

In my letter, I wrote of two heartbeats
That beat together as one.
Of the bond we shared between us,
Like the bond of father and son.

I wrote that I would love her
No matter what should come.
I asked her to always remember
Where her heart would always be home.

The moment I signed my name,
I felt a warmth inside.
A deep, eternal, everlasting love,
Within my heart did abide.

I was reminded that this title,
Though used in many ways,
Is sacred and a blessing
For women to use each day.

This prestigious, yet modest name
Is sometimes hidden by others,
But brings more love and joy than any.
I am humbled to be a Mother.


We visited the park today with our friends Mariasha and Quinn (you know, the fine lady who takes almost all of my pictures?). So glad the weather is getting nicer! Chelsea loved the wobbly bridge and slide, but we might have to wait awhile for the swing. Oh. And it only took two seconds out of the stroller and out of Mom's arms for the sand to go off of the ground and into Chelsea's mouth. That's my girl!

-Sue


1

Reflecting on the week

March 8, 2013
I'll be the first to admit, this post is not going to be all that exciting and not at all useful, but I'll do the best I can! If you're looking for something interesting, maybe you should try the Bodacious Braidhawk tutorial or the Butterbeer, or one of my favorites: Homemade Nutter Butters. Yummmm...
In an effort of self-betterment, I have included in my weekly plannings time for reading and time for service. The book? Wuthering Heights. The service? Judging Historical Exhibits.
Wuthering Heights is an anomaly. I was talking to Drew about it a couple of nights ago, explaining the characters and their relations with one another, the diabolical schemes of Heathcliff, the selfishness of Catherine, the wisdom and kindness of Nelly, etc. when Drew asked me, "Well, does it end happy?" I've never read the book before so I guess I'm not positive, but from the movies I've seen (the black and white one and the newer version with Tom Hardy), I answered, "No. I don't think there's a happy point in the entire book," to which he replied, "Then why are you reading it?"
I pondered over that question. Why is Wuthering Heights a classic? It is a tragedy of the worst kind. There is no happiness and Heathcliff really is the devil. Here are my conclusions:
I read it for the amazing way it is written. The book begins as a story about Mr. Lockwood, the newest resident of Thrushcross Grange (a nearby home to Wuthering Heights) who meets the residents of the Heights. After being surprised (to say the least) at the inhospitality of its occupants, the author, Emily Bronte, then takes you back to the Grange where you learn the entire history from Nelly, the housemaid. It is a unique perspective that I don't think I've read in any other book. The entire time I'm wondering, "What if this story was told from Heathcliff's point of view, or Catherine's?"
I think another reason this book is so enticing is partly because you want to know how far a man can sink! I'm convinced that there's not a more scheming or heartless man as Heathcliff in all literature. And yet, the moments he speaks of Catherine, its as if you've never heard of a love as deep as his. It drives me crazy because I can't understand why he would be so selfish and horrible to someone he loved so much. I'm trying to decide who is the worst villain. The terribly selfish, Catherine, or the devilish Heathcliff?
I could probably go on for a while longer about the book, but I'll stop right there and tell you, if you haven't read it, or at least given it a try, it would be worth your while.
Now. For the Historical Exhibit Judging. It was a pretty fun experience! I arrived at 8:15 A.M. to learn about what I needed to judge, how to judge, etc. then was released at 9:00 with a list of projects and names I was supposed to judge. I was surprised at the creativity and knowledge of these 5-8 graders. The theme of the year was "Turning Points." The students were supposed to pick an event in history that they believed was a major turning point in our world today. One of my favorites was a pair of boys who chose Atari (and pong) as a major turning point. Classic. I'm not sure who won, but it was a neat experience. It lasted until 12:00 and I was pretty tired by then, but at least we got free lunch! Good thing, too because I needed my strength to then run up four flights of stairs, across a land bridge, down a couple flights of stairs and down the platform to board the train. I'm glad I've been running.
Possibly the best part of this week was on Wednesday night when the family and I went to an elderly woman's home for dinner. She made us a genuine German dinner with Veal, potatoes, peas and corn, and concluded with German Cake. It was possibly the best dessert I have ever tasted, but better still was the talk we had with this wonderfully, kind woman. She told us about her life, how she had struggled in her marriage to her husband, eventually leading to divorce because he shirked his responsibilities (to say the least) as a husband and father, and how she overcame it and provided for herself and her family through various talents that she possesses. At one point, she even made and sold stuffed animals. What an example! Before we left, she even gave Chelsea a stuffed teddy bear that she had been playing with. When I'm an old woman, I want to be as kind and giving as this wonderful woman.
So there ya have it! That's what's been on my mind this week, for the most part. I'm sorry I don't have any good pictures for you today, but to make up for it, I'm working on a project that I think you'll really like! Hopefully I can get it done this weekend and up next week. I've also got a couple of new items from the store that I'd like to share. If I'm able to get pictures tomorrow, I'll post them ASAP! I'll see you next time I see you (if I didn't bore you to death with this novel)!

-Sue
2

F.I.V.E.

March 5, 2013
One of my lovely blogging friends, Jamey from simply animated, posted this F.I.V.E. blog post on her blog and I thought, why not? Although, I'm not sure what the F.I.V.E. stands for... Maybe I'll make something up as I go?


F. Fandidilytastic is one of my favorite words to use. It seems to always catch everyone off guard and gets me a laugh or two in the process. I use it in phrases such as, "Have a fandidilytastic day," or in answer to another's query about the status of my day thus far.

I. If I were ever to do something illegal, it would probably be something super stellar. Like, oh I don't know, throwing something off a bridge or spying on a supposed member of the Black Spee-ider. Ever heard of those guys? Neither have I, but spying is illegal, right?

V. I have a voracious appetite when it comes to avocados (guacamole in particular) and this incredible salad I made last night with mandarin oranges, spinach, red leaf romaine lettuce, bacon, and avocado, all drizzled over with raspberry vinaigrette. Mmmmm... It was breathtaking... Because I couldn't get a breath in my 50 miles per hour sprint of eating.

E. I never understood one of the funniest lines from "Get Smart" until I went to college and learned what "Existentialism" meant.
"In fact, your essay on existentialism was quite amazing."
"I left that section blank."
"Blank? Brilliant."
I am a movie quote-er. My whole family is. We love movies. Some of our favorites are "Three Amigos," "Condorman," and "What About Bob?" If any of you have seen "Condorman," you get an automatic cyber high five and please leave a comment. I would like to know that my family and I aren't the only ones in the world.

! And just because I'm pretty sure there are supposed to be five fun facts, here's a really good one... ANOTHER GIVEAWAY IS COMING UP SOON! I'm not exactly sure when, but it's gonna be soon, so if you missed out on the last one, don't miss out on this one and tell your friends! My goal is to get 100+ followers before the end of the year and I am almost there!

Hope that was interesting enough for you! If you have a blog, feel free to pass this lovely link-up along! I'm sure that Miss Jamey would be thrilled to get to know you, as would I. Have a great rest of your day and I'll see you later this week!

-Sue
3

The Mom Box

March 4, 2013
Have you ever had the experience where you're so wrapped up in a situation that you almost forget everything about your life and are completely wrapped up in the situation? This can be a really neat experience or a really bad one. Like when your reading a really good book or when there is an event in your life that you completely fixate on and can't get over.
Well, that happens almost every time I talk on the phone to my oldest sister, Kimberlee. She is an amazing story teller even when she isn't making one up. In her everyday conversations she manages to sweep me away with a story about how her family invented a story during church about two Unicorns trying to befriend an arsonist Unicorn, but they have a hard time doing it because all unicorns are bipolar and they have to go to therapy and the arsonist unicorn doesn't and that's why she is an arsonist. Seriously. That's how cool my sister and her family are (the story continues that the two unicorns try to divert the arsonist's arson tendencies by getting her a new hobby, like being in the illegal gun black market).
After hearing all about these mystical unicorns and the illegal black market, Kimberlee continued by telling me about one of the best ideas she has come up with as a mother for her children.


This is a Mom Box (only cost me $1.75 at Michael's). With a function much like a mailbox, it provides a means of correspondence between Kimberlee and her children. Every day she will leave a on inspirational quote or just a little love note with a treat for her children. The older kids even have a second box underneath the first where she they will write only positive things, like their lifelong goals or dreams. This helps them with their self-image and I think helps them keep a lifelong perspective because it can be so easy to fixate on predicaments now that may not really be that important in the long-run.
I absolutely love this idea, but with only a 10-month-old, it's not exactly the perfect idea for me, so I've made a little adjustment. Every day (alright, maybe not everyday, but at least once a week), I will write something down that Chelsea did that was cute or funny and save it in the Mom Box, and when she gets older, she can read through them, and the box will gradually change over time as she grows older and situations change. I think this will become a really special bonding experience for me and my daughter as well as a sweet reminder of what a good, sweet person Chelsea is. What a blessing it is to be a mother!
I want to share one more thing that my sister said. She was blessed with many talents. She plays the violin beautifully, writes amazingly, runs, and is so creative. But there are enough concert violinists in the world. There are enough writers, runners, and creative geniuses. What there aren't enough of are good mothers. I am so glad that I have been willing to give up "the big time" to give my talents to my family. This is not to say, "give up on your dreams and talents," (that's why I love blogging so much, because it provides an outlet for me to share with others my ideas and talents). It's more to say that being a mother is the most rewarding thing you can do, and I'm glad that I made that choice. What about you?

-Sue


1

DIY adjusted 90s Mom dress

March 1, 2013
I am so excited to share this tutorial for you for a couple of reasons:

1. It turned out SO cute!
2. It was SUPER easy!
3. It took me 1.5 hours!
4. It cost me a grand total of $6.00!

I already had the elastic and the thread, so really it only cost me $6.00 for the old dress. Seriously, it was so easy. Although I can't take all the credit. The dress obviously had hidden potential and my sister-in-law came up with the original vision. She even bleached her dress at the end, but I like the original blue color. Get ready for the tutorial...

Before:

After:
It looks like BOTH of us got an adjustment.
Sometimes night-time is the best time to work on my projects.

You will need:
One 90s Mom dress that your first grade teacher wore (odds are very likely you'll find one of these at your local thrift store). The size doesn't matter too much. Mine was a size Small Petite (I am not petite).
Thread (I used gray on Kara's and off-white on mine)
1/4" elastic long enough to go around your waist (mine was 30")
Binding (optional)

Step 1:
Try the dress on and use pins to mark the spots where you want the length to be. The sleeves (if the dress is long sleeved) and the length.

Step 2: Take the dress off and add 1.5 inches to the length of those spots for seam allowance, then cut. To make sure the sleeves were cut at the correct angle, I just folded it up on itself and lined up the original sleeve "cuff."
Note: If the sleeves are a little too big for your taste, try the dress on again, decide on how big the arm hole needs to be, turn the dress inside-out, and straight stitch 1/4 inch past the place where the sleeve is sewn onto the dress. Leaving your needle in the material, lift your sewing foot, turn your dress, drop your sewing foot, then gradually stitch down back towards the original side seam in your dress before you reach the point where you want your elastic (DO NOT sew down the entire dress). Zig-zag stitch along the outside of your straight stitch and cut the excess (this prevents any fraying).

Step 3: Measure around your waist where you want the elastic to go (not too tight) and cut your elastic to that length. Like I said, mine was 30".

Step 4: Pin the center of your elastic to the center of the back of your dress.

Find the middle between the end of your elastic and the center of your elastic and pin that to the side seam of your dress on both sides.


And finally pin the end of your elastic to the edge of the dress. Make sure you do this on both ends.


Step 5: Set your sewing machine to a zig-zag stitch as long and wide as it will go, and starting at one end,
stitch on top of the elastic, stretching it to lie flat on your dress as you sew.
Note: I didn't mind the zig-zag stitch showing on the outside of the dress because I knew I would wear a belt, but if it bothers you, I'm sure you could stitch a binding to cover it.


Step 6: Set your sewing machine back to a regular straight stitch and hem the bottom of your dress at 3/4" (fold it over once 3/4", then fold it over again 3/4"). Be sure to straight stitch along the very edge of the dress at about 1/8" to give it a finished look. Repeat these steps for the sleeves if you've cut them off.

And that is it! Seriously, so easy and I love that it only cost me $6.00. Works as everyday clothing, or even for the beach! I can not WAIT for the summer! Be sure to check out my Etsy shop! I've updated the Etsy page on my blog and I've posted a couple more listings that I think you'll really like, including the Changing mat I posted about a few days ago. Have a great weekend and I'll see you again on Monday!

-Sue

It has pockets!


POCKETS!


Did I mention that it has pockets? LOVE it!


Thank you for always taking my pictures, Mariasha!
And for letting me borrow your shoes!
5
Powered by Blogger.