Sue's News: Chevron

Showing posts with label Chevron. Show all posts

CAMERA STRAP TUTORIAL

April 29, 2013
Hello lovelies! How do you like the new look? I'll admit, inspiration came from elsewhere. I've been having issues editing the template on my blog so I searched it on Google and found the answer from another fellow blogger, Shelly. Definitely a follower now. She has so many amazing photos and I love the layout of her blog. Call me a copycat if you want. It's just a compliment to the person I copied.
Anyway, due to popular demand, I've decided to make a camera strap tutorial. Making a camera strap is probably one of the easiest tutorials that I have made, and yet, I somehow managed to make a few mistakes along the way. Count yourself lucky to have me around to make all your mistakes for you. You're welcome.


You will need:
1/3 yard of fabric
1/3 yard of additional fabric (for underside if desired)
Fusible fleece 1/8+ yard
3 yards of 2" Lace (opt.)

Dimensions:
Camera strap top - 4x22"
Camera strap underside - 4x22"
Lens cap pocket - 4x4" (cut two)
Fusible fleece - 4x22"
Lace - 44" (cut two)

1. Iron out all of your fabric and cut your fabric out to the dimensions above. Keep in mind the direction of the print of your fabric. If the print is going horizontally, then you'll need to get 22" of fabric so you can get the right direction. Riley Blake Chevron fabric (for instance) is horizontal, so you'd want to get 22" instead of 1/3 yard. Also, if you want your camera strap to be longer than mine, you might need to get more fabric.

2. Following the directions afforded you with the fusible fleece, iron the fleece to the wrong side of the fabric that will be on the underside of the camera strap (where it will be against your neck).

3. Place your 44" lace "ribbons" right-sides together and pin along one side. Do a straight stitch where you've pinned to keep them together with a 1/2" seam allowance. Flatten out lace with your hands and use the longest stitch possible to sew straight down where you've just sewn. Place a pin in the center of the lace you've just sewn together and set aside.

4. Put your two pocket pieces right sides together and do a straight stitch with a 1/2" seam allowance across the top. Flip pocket so that right sides are facing out and iron. Do a finishing stitch across the top at 1/8" seam allowance.

5. Pin the pocket on top of the camera strap top at one end, lining up raw edges. Sew the pocket in place with a 1/4" seam allowance around sides and bottom.

*If you're not using lace, skip step 6.

6. From the top of the pocket to the other end of the camera strap top, find the center and pin the center of your lace there. Gather the lace until it is the proper length (from one end to the top of the pocket), pin in place, then sew in place with a regular straight stitch. Fold excess lace by the pocket under and stitch down.

7. Making sure the lace is out of the way, pin the camera strap top piece to the camera strap underside, right sides together. Using a straight stitch, sew along the long edges with a 3/8" seam allowance (you can do 1/2" seam allowance, but the pocket will be a little more snug), leaving the two shorter ends un-sewn. Zig-zag the raw edges of long sides. Turn strap right-side out and press.

8. Fold shorter ends under two times to avoid any fraying and sew in place (or zig-zag top and underside separately and fold under once). Make sure you fold the camera strap top and the camera strap underside separately or you'll close the entryway and exit of the camera strap!

Slide in your camera strap and voila! Your very own, very washable camera strap! Love it! Now go take some photos!


-Sue

P.S. If any of you are having the same issue editing your blog that I was, leave a comment and I'll direct you to a tutorial to help you get it fixed!

P.S.S. I decided to link up with Emily over at The Freckled Fox for a Sew and Tell (cute play on words)! Go check her out and meet some new friends while you're at it!

6

Cookbook Organizer

April 3, 2013
One thing that Chelsea has really enjoyed doing since the beginning of her roaming days is pulling out all the cookbooks on my bookshelf in the kitchen. Normally this wouldn't be a big deal, except one of my cookbooks is big, bulky, and the cover is now successfully removed from the rest of the book/spine. Almost. So I decided that something needed to be done. Luckily, I saw a friend who came up with a good idea for organization.
It's as easy as cut, paint, mod podge. Literally. So easy, and it looks great!


I'll let you know how it works out. See you Friday!

-Sue
2

High chair cover

March 18, 2013
For a while now I've been wanting to do something like this, but wasn't exactly sure how to do it so I put it on the backburner. Then, when I made the car seat protector, I knew how to do it! Well... Sorta. I wanted to do it in a harder way than it was actually done and paid the price for my ambition later. Anyway, here's what my end product looked like. Sorry for the quality of the photos. Maybe I'll get some better ones eventually...


So it actually was really easy! I knew I didn't have to cover the entire seat because the main part that got messy was the top because Chelsea likes to suck on it... With her mouth... Full of food. I don't know why. Anyway, so here's how I made it.

You will need:
Fabric that's cut to about 9x28 inches (depending on your high chair (note: this probably won't work on all high chairs)
Iron-on vinyl, enough to cover the 9x28 inches of fabric
Quilter's binding
Velcro
1/4" elastic

If you made the car seat protector from last week, you might have al of these items already (except the elastic). Ready for step 1?

Step 1: If you haven't already, cut your fabric to be 9x28" or whatever the dimensions of your high chair are. Follow the directions and laminate your fabric. Then hem the shorter ends of the fabric.

Step 2: Sew the quilters binding along both long edges of the laminated fabric, leaving 5 inches hanging off the edges for the Velcro (I didn't have enough binding so I just sewed the Velcro on the big piece and I don't think it looks as good, but it works).

Step 3: Cut two pieces of elastic, each 17" long. Using a safety pin fastened securely to one end of the elastic, slide it through the binding, sewing the safety pin-less end to the edge once it gets there. Slide the elastic the rest of the way through and sew the other end in place. Repeat on both sides.

When you're done sewing the elastic through, it should look something like this.

Like a dying centipede or something...

Step 4: Cut four pieces of Velcro 4 inches each (2 rough sides and 2 soft sides) and sew them so that they'll work to fasten the cover to the high chair (I know you can figure it out!). I just sewed around the entire piece of Velcro.
And that's it! Now it will be MUCH easier for me to clean that high chair! Have fun with yours!

-Sue 


0

Car Seat Protector

March 13, 2013
When you're just a year out of college and barely getting your feet under you, not a lot of exciting stuff happens in the "new big items" department. Oh, I'm not complaining, though! Being the youngest (and only slightly spoiled... slightly...) and having wise, vigilant parents, I was well-aware that there is a tendency for girls in my position to want to have everything they had while growing up when their parents already had their finances and everything figured out, and they want it all right away. Not necessarily because their spoiled, but because they've got this expectation and view of how married life should be. I assume that's how other girls in my position think sometimes.
In any case, I was aware of that danger and so I've tried really hard to fight it. Sometimes I fail and go into this miserable state where I just want to cry because of what I don't have. Then I just remember something I read on Pinterest. "Sometimes I get sad, but then I remember how awesome I am and get over it." So that's basically what I do.
Anyway, so  back to what I was trying to say. Not a lot of exciting stuff happens in the "new big items" department. Well, ever since Andrew got his job, we've been setting a little aside for a car and finally, we got one!


I absolutely love it! Our old car was a two door and not exactly ideal for getting Chelsea in and out (when I say "not ideal," I mean it sucked). It's not a new car, but it's a new-to-us car and it's almost exactly like my mom's car she got a few years back so I either feel really mature driving it, or like a teenager just borrowing it for the day.
Now I'm not clean freak, but I do like to keep my things neat and tidy, plus I know leather seats can get pretty beat up by baby car seats. I came up with this for a solution... Alright, alright, I got the idea off of Pinterest, but I altered it to fit my own specifications.

The Car Seat Protector!

I love it! Every time I look in the back of the car and see it, it makes me happy! It looks professional and, most importantly, it protects the seat! I had to cut a chunk out of the side for the car seat anchor to be able to go through, but that doesn't interfere with the protection of the seats at all. It wasn't too difficult, but it was a little time consuming. Lucky for you, it's in my Etsy shop for a great price, but for you DIYers, I'll give you a quick run down of how I did it.

Materials needed:
Laminated fabric (you can buy laminated fabric from etsy or make it yourself)
Quilter's Binding
Double Fold Bias tape (mine was extra wide)
Velcro

Figure out how wide and how long you want your seat protector to be (mine is 18x47") and cut your fabric to those measurements, using a plate to give you nice curves around the corners. The print on my fabric was sideways so I had to cut two pieces to fit. Hold the piece(s) up to the car seat (on the same side you want it to be when you're done) to decide how far in to cut the chunk out for the car seat anchor. Sew the two pieces together (if you have two pieces) then pin your bias tape all the way around. Add the quilter's binding to the top by sewing it to the bias and letting it extend from the point where the top corner of your seat protector stops curving. Do this on both sides of the top. Sew your Velcro to that. Voila! C'est fini!

Disclaimer: Most manufacturers and safety specialists say that placing something thin (like a thin towel) under a seat is okay, but check with your car seat manufacturere and up to date car seat safety info to make sure. Also most fires stations will check your car seat for you to make sure it is installed correctly. See more at: http://www.car-safety.org/faq.html#Q36

Please stop by my Etsy shop and check it out! I've got a few other items there that you'll want to check on as well! Maybe you can leave a comment and tell me which one you like best? Hope to see you there!

-Sue


This product is Chelsea approved!

Here are some of my other items in my Etsy shop! Hope you like them!
Changing Mat

Sunglasses Cozy

Laptop Sleeve
4

Changing Mat

February 25, 2013
Back when I first started my pinning on Pinterest, I came across a beautiful specimen. It was this changing mat.

via

So, I did what Pinterest is good for. I pinned it to my sewing board and never looked at it again.
And then my mother-in-law came for a visit. She lives in California and doesn't get to see little Chelsea very often so when she comes, it's a very special thing! This visit, Grammy brought a couple of gifts! She brought a book for Chelsea (Drew's favorite when he was a little boy), and some super cute, high-quality, cotton, chevron fabric! I loved it and had to think of something really special to make with it. That's when I remembered my pin from the past and I was grateful to find that it even came with a very informative tutorial with video instructions and written instructions. Maybe that's what I should start doing, too.
So here it is! I give this project an 11 out of 10! It has been so useful already and my cluttered bag was de-cluttered instantly! Plus, it wasn't too expensive (about $20.00 to make not including the fabric Mom-in-law bought me) and not too difficult, either. The only thing I would change about this tutorial is adding in a couple of steps to baste the layers together before stitching all four layers (or however many) because the layers slid around a little as I sewed and  I had to do some picking. Besides that, I love it.


The changing mat itself is Chevron and the pockets are a floral print with eyelet lace. Coincidence? No. Cute? Yes. Love it, I do.

If you're not the sewing crafty type but would love to have this baby, they're also available in my Etsy shop, ChevronandLace.

-Sue
3

Risks...

February 9, 2013
Just before the first snow fell in my hometown, I was over at a friends house helping her clean up her yard a bit. During our conversation about family, friends, the past, the future, etc., Jill told me something that has really inspired me. "If you don't try, then you might regret it. Don't live with regret." My dad has always told me something similar. "If you don't try out, you're guaranteed not to make it!" And a wonderful friend up at college said to me, "Life is all about the risks. If you don't take any risks, you're not going to go anywhere."
It seems like sometimes I forget their advice. I'm grateful that I haven't always forgotten because as a result of my college peer's advice, I decided to date my husband a little longer when I was considering breaking up with him. As a result of my father's advice, I participated in many activities that brought me so much joy, especially dancing on the World Dance team at BYU-I.
Jill's advice has remained un-practiced since she gave it a few months ago... Until now.
I've decided to try something new. I'm going to open up an Etsy shop and this time, I'm going to make it stick! I've been a little apprehensive about it since it has not done well in the past, but I'm really excited about what I have to show you and I think you will be, too!

I've been knitting since I was eight, believe it or not! Most of my family got into it, actually and at one time we all had our own matching slippers, and let me tell you... Those slippers plus some nice, long wood floor? Amazing. Anyway, it's been my favorite past-time for General Conference ever since (when the leaders of the Church of Jesus Christ of Latter-Day-Saints broadcast via television and radio direction and guidance from God).
At this time, I'm not selling slippers, but here's what I do have, and I think you're going to LOVE it!

Bow Scarf:

I can make this scarf in any color you like and any size, whether you want it for yourself or for a little one. It'll keep whoever it is wrapped around nice and toasty warm while making them just about the cutest button anyone has ever seen!

Bow Beanie:
Why stop there? I am loving this bow beanie! Keeps your head warm and draws attention to your face and the eyes in-particular!

Laptop Sleeve:

This is the reason I've been a little absent from the blog this week. This laptop sleeve is really nifty when it comes to protecting your laptop from scratches! Not to mention its colorful design. Not particularly fond of the multiple colors?
Try the sideways heart! Other colors/designs available upon request.

To come (maybe):

iPhone, iPod, iPad, etc. sleeves. Protect anything scratchable!
Heart patches on the elbows? Yesh pleash!
Baby booties
Matching children and adult skirts. Single skirts available as well.

So what do you think? Which one is your favorite? Also, I'd really love some comments on whether or not to even try selling the heart patches, baby booties, and matching skirts. Would you buy any of those?
Need further enticement? Check back on Monday!

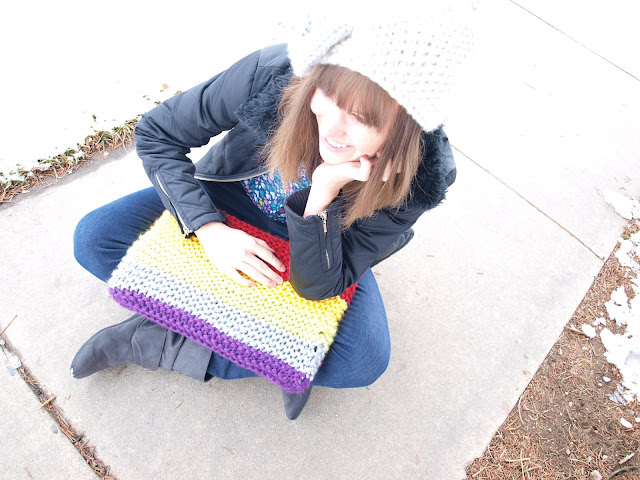
Hmmm... Should I tell them that I enjoy blogging in the middle of a sidewalk? Naw!


In case you're wondering...
Jacket: Old from Maurices and one of the best purchases I've ever made.
Shirt: Target on sale for $8.00 (approx.)
Belt: Cheap belt from pants that I bought at Target
Pants: Plato's Closet via H&M $10.00 (approx.)
Shoes: Ross $10.00 (approx.)
Smile: Mommy and Daddy (Dad says it's worth a million bucks!)

This is what blogging in Heaven must look like...


0

Christmas Advent Calendar

December 21, 2012
Alright, it's not completely done, but I'll update you on the status of my Christmas Advent Calendar anyway...

Status update:
It's coming a long.

There ya have it! But just in case you're wondering, here's the detailed version of what I've done...

You will need:
LOTS of different colored felt
Sewing Machine, needle, thread, etc.
Velcro
Hot glue gun
Hard felt... stuff (can't remember what it's called, but you'll know what I'm talking about when you go to the felt section of the craft store)


Step 1: Cut out your background, squares (for pockets), tree, and numbers. Make sure you cut your numbers (1-24) out to a size that will fit easily on your squares.

Step 2: Sew or hot glue gun your numbers to your pocket squares.

Step 3: Measure carefully to get your squares on straight, and sew your pockets to your background. This time I would definitely sew because it will probably hold better than hot glue. I tried drawing little Ls around the corners, but ended up hand-stitching big basting stitches to hold the pockets down while I sewed. Try it any way you like.

Step 4: Cut out your tree and sew it to your background.

Step 5: Start in on your ornaments! For these, I would definitely use a hot glue gun. Hand stitching is taking WAY longer than I anticipated. Here are the ornaments I made/am making:

1. Gingerbread man
2. Snowman
3. Candle
4. Candy Cane
5. Baby Jesus
6. Santa Clause
7. Bow
8. Christmas Present-1
9. Christmas Present-2
10. Dove
11. Mitten-1
12. Mitten-2 (because I think the mittens are SO cute!)
13. Teddy bear
14. Snowflake
15. Peppermint candy
16. Bell
17. Stocking-1
18. Stocking-2
19. Holly/mistletoe
20. Reindeer
21. Mug of hot cocoa
22. Regular Christmas tree ornament (glass ball)
23. Mouse
24. Star

Step 6: Hot glue the hard felt to the back of your ornament (so it slides in and out of the pocket easily)


Step 7: Hot glue small pieces of Velcro to the tree and to the back of your ornament. GLUE THE SOFT SIDE OF THE VELCRO TO YOUR ORNAMENT! That way your ornament doesn't catch on the felt on the way into the pocket, you know what I mean?


Step 8: Sew a 1 inch "hem" along the top edge of the calendar for your rod to go through (unless your rod is thicker than that!). Before sliding the rod in, measure 2" in from each side (along the hem), and cut out two little rectangles (about 1/2") along the top, almost down to the seam. Slip the rod through, and tie a ribbon around the rod at the places where you cut out the rectangles. Make sense? Cut the ribbon to the length of your preference.

Step 9: When you store it, leave all the pieces up on the tree so the rough side of the Velcro doesn't mess up your calendar.


And there you have it! One, beautifully made Christmas Advent Calendar! You can add some nice scriptures of the Christmas story to read with each day as well! It helps remind me of the reason for this season. Merry Christmas!
0
Powered by Blogger.